Connect with us

Technology

How to Install Mantine: A Step-by-Step Guide

Published

on

Mantine is a popular React component library that provides a vast array of customizable UI components and hooks, making it easy for developers to create modern, responsive, and accessible web applications. In this article, we will cover the step-by-step process of installing Mantine in your React project, including different methods based on your project setup, and how to start using its powerful features.

Prerequisites

Before installing Mantine, ensure that the following prerequisites are met:

  1. React: Mantine requires React version 17 or later.
  2. Node.js: Make sure you have Node.js installed.
  3. Package Manager: You can use either npm or yarn to manage dependencies.
  4. Code Editor: A code editor like Visual Studio Code is recommended for working with your project.

If you haven’t set up a React project yet, follow these steps to create one.

1. Create a React Project

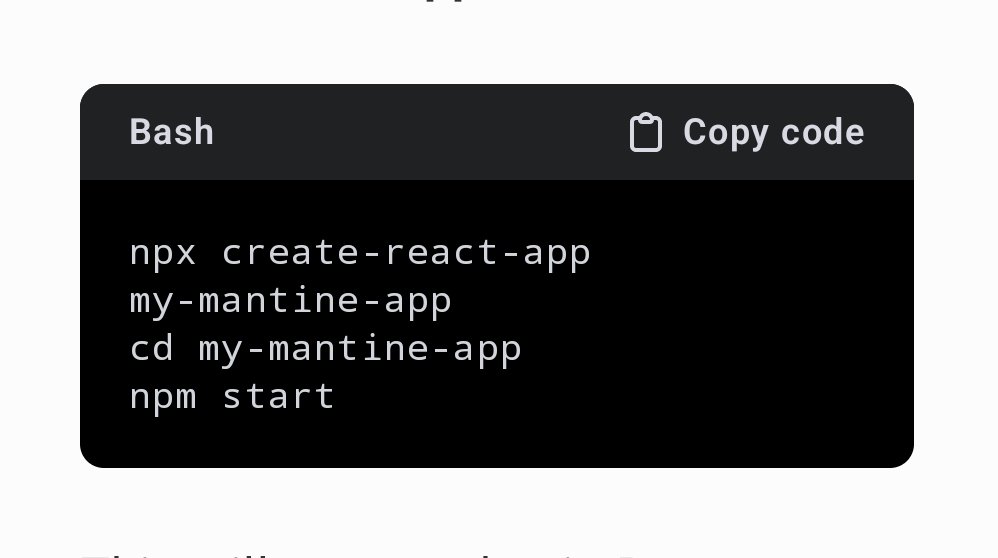
To start with a fresh React project, use the following command to set up a new application using the Create React App tool:

npx create-react-app my-mantine-app
cd my-mantine-app
npm start

This will create a basic React project and start a development server. Now you’re ready to install Mantine.

2. Installing Mantine

Mantine’s core components and hooks are available as separate packages. You’ll need to install both to get the basic functionality of Mantine.

a. Install Core Components and Hooks

You can install Mantine using npm or yarn:

Using npm:

npm install @mantine/core @mantine/hooks

Using yarn:

yarn add @mantine/core @mantine/hooks

These commands install the core Mantine library and its collection of hooks for state and UI management.

b. Install Additional Mantine Packages (Optional)

Depending on your project’s needs, you can install additional Mantine packages. Some popular options include:

  • @mantine/notifications – for adding notifications to your app.
  • @mantine/form – for managing forms.
  • @mantine/dates – for date pickers and calendars.
  • @mantine/dropzone – for drag-and-drop file uploads.

For example, to install the notifications system, use the following:

npm install @mantine/notifications

Or for yarn:

yarn add @mantine/notifications

These additional packages enhance your application with specialized functionality.

3. Setting Up Mantine in Your Project

Once the necessary packages are installed, the next step is to integrate Mantine into your React app.

a. Import and Use Mantine Components

Start by importing Mantine’s components and wrapping your app in the MantineProvider, which will manage global styles and theming.

In your src/App.js (or src/App.tsx if using TypeScript), replace the default code with the following:

import React from 'react';
import { MantineProvider, Button } from '@mantine/core';

function App() {
  return (
    <MantineProvider withGlobalStyles withNormalizeCSS>
      <div>
        <h1>Welcome to Mantine</h1>
        <Button>Hello Mantine</Button>
      </div>
    </MantineProvider>
  );
}

export default App;

This basic example demonstrates how to add a Mantine button component to your app.

b. Theming and Customization

Mantine allows you to customize the look and feel of your application by defining themes. You can override the default theme with your own styles by configuring the MantineProvider.

Here’s how you can apply a custom dark theme:

import React from 'react';
import { MantineProvider } from '@mantine/core';

function App() {
  return (
    <MantineProvider theme={{ colorScheme: 'dark' }}>
      <div>
        <h1>Dark Mode Enabled</h1>
      </div>
    </MantineProvider>
  );
}

export default App;

You can extend this theme by modifying color schemes, typography, spacing, and other design elements to match your brand.

c. Responsive Design with Mantine

Mantine’s components are designed to be fully responsive out of the box. You can use its grid system to create layouts that adapt to different screen sizes. Here’s an example of a simple responsive layout:

import React from 'react';
import { Grid, Col } from '@mantine/core';

function App() {
  return (
    <Grid>
      <Col span={6}>Left Column</Col>
      <Col span={6}>Right Column</Col>
    </Grid>
  );
}

export default App;

The grid layout will automatically adjust based on the screen size, ensuring a responsive design.

4. PostCSS Configuration (Optional)

If your project uses PostCSS, you can further enhance your Mantine setup by installing the postcss-preset-mantine plugin. This is especially useful if you’re working with frameworks like Vite.

Install PostCSS dependencies:

yarn add --dev postcss postcss-preset-mantine postcss-simple-vars

Then, create a postcss.config.cjs file at the root of your project and add the following configuration:

module.exports = {
  plugins: {
    'postcss-preset-mantine': {},
    'postcss-simple-vars': {
      variables: {
        'mantine-breakpoint-xs': '36em',
        'mantine-breakpoint-sm': '48em',
        'mantine-breakpoint-md': '62em',
        'mantine-breakpoint-lg': '75em',
        'mantine-breakpoint-xl': '88em',
      },
    },
  },
};

This setup ensures that Mantine integrates smoothly with your PostCSS configuration.

Conclusion

Mantine is a powerful and flexible UI library for React that allows you to build beautiful, accessible, and responsive applications quickly. Its seamless integration with React, along with a wide array of customizable components, makes it an excellent choice for developers. Whether you need forms, buttons, notifications, or custom theming, Mantine has the tools you need to get started.

By following the steps outlined above, you should have Mantine up and running in your project. Explore the wide range of components in the official Mantine documentation to take full advantage of what it has to offer.

Continue Reading
Click to comment

Leave a Reply

Your email address will not be published. Required fields are marked *

Technology

How to Unarchive Projects in Basecamp: A Comprehensive Guide

Published

on

Introduction

Basecamp is one of the most popular project management tools available, offering a straightforward way to organize tasks, communicate with team members, and keep track of project progress. However, as projects evolve, it’s common for them to be archived, especially when they are paused or completed. But what happens when you need to revisit an archived project? Knowing how to unarchive in Basecamp is crucial to restoring workflows, recovering important data, or reviving old projects.

In this blog, we will break down how to unarchive in Basecamp step by step, discuss its benefits, and share practical tips for efficient project management.

1. What is Project Archiving in Basecamp?

Project archiving in Basecamp is a feature that allows users to move inactive or completed projects into a separate section, making them easily accessible yet hidden from the active project dashboard. Archiving helps reduce clutter, streamline current tasks, and maintain a tidy workspace while preserving past project data.

When a project is archived, all related data—including messages, to-dos, files, and other resources—remains intact, but the project is not displayed on your active projects list. This can improve the overall organization and reduce distractions, especially when managing a large number of projects.

Key Features of Archived Projects:

  • Not visible on the active projects dashboard.
  • Preserves all project data without deletion.
  • Accessible from the “Archived” section in Basecamp.

2. Why You Might Need to Unarchive a Project

You might need to unarchive a project in Basecamp for several reasons, depending on your project management strategy. Below are the most common scenarios:

  • Reviving a Paused Project: If a project was paused or put on hold, you might need to restore it and resume work. Unarchiving brings it back into your active dashboard for easy access.
  • Accessing Old Data: Occasionally, you may need to revisit archived files, messages, or tasks for reference or auditing purposes.
  • Project Restart: Perhaps a client has re-engaged after a period of dormancy, requiring you to pick up where you left off.
  • Team Collaboration: Your team may need to collaborate on a project that was previously closed but now requires input from new stakeholders or departments.

The unarchiving process is simple and ensures that no project data is lost in the transition. Let’s move on to the steps on how to unarchive projects in Basecamp.

3. How to Unarchive in Basecamp: Step-by-Step Guide

Step 1: Log in to Your Basecamp Account

First, log in to your Basecamp account using your credentials. Ensure that you have the necessary permissions to access the archived projects, as only team members or project administrators can unarchive projects.

Step 2: Navigate to the “Archived Projects” Section

Once logged in, you will be on the dashboard that shows your active projects. To access archived projects:

  • In Basecamp 3 and Basecamp 4 (the latest versions), go to the main menu on the left-hand side.
  • Scroll down until you find an option called “Archived Projects” or “View All Projects,” which will lead you to a list of both archived and active projects.

Step 3: Select the Project to Unarchive

In the archived projects section, locate the project you want to restore. You can use the search function if there are many archived projects, or simply scroll until you find the correct one.

Step 4: Unarchive the Project

Once you have located the desired project, click on it to open the project page. At the top of the page, there will be an option labeled “Unarchive” or “Restore to Active.” Click on this button to unarchive the project.

Step 5: Confirm the Unarchive Action

Basecamp will ask you to confirm that you want to

Continue Reading

Technology

Analyzing SIGGRAPH Research: How to Craft Effective Slides for Presentations

Published

on

SIGGRAPH (Special Interest Group on Computer Graphics and Interactive Techniques) conferences are renowned for presenting cutting-edge research in the fields of computer graphics, virtual reality, and interactive technologies. For researchers aiming to present their work, crafting compelling slides is a crucial part of communicating complex ideas effectively.

In this blog, we will explore strategies for creating impactful presentation slides tailored to SIGGRAPH research. We’ll delve into key elements such as clarity, visual design, content organization, and common mistakes to avoid. Whether you are preparing to present at a SIGGRAPH conference or another technical event, these tips will help ensure your research is understood and remembered by your audience.

1. Understanding SIGGRAPH Audience and Expectations

Presenting at SIGGRAPH means addressing a highly specialized audience. Attendees include leading experts, industry professionals, academics, and students in the fields of computer graphics and interactive techniques. Because of this, your audience is often familiar with complex concepts but expects clarity and focus in the presentation of new research.

Key expectations include:

  • Clear Communication: SIGGRAPH audiences look for presentations that make new research understandable, even if the concepts are complex.
  • Novelty: The audience expects to see the latest advancements or fresh approaches to established problems.
  • Visual Appeal: SIGGRAPH is highly visual, meaning the slides should be not only informative but visually engaging.

Understanding these expectations is essential because it will guide how you structure and design your slides. This helps avoid overloading the audience with too much technical detail or creating visuals that do not effectively communicate your findings.

2. Slide Design Fundamentals for Research Presentations

Clarity and Simplicity

One of the most important aspects of effective slide design for SIGGRAPH research is clarity. Avoid cramming slides with too much information. Each slide should have a focused message or piece of information that is easy to digest.

  • Avoid Text Overload: Instead of filling slides with paragraphs of text, use concise bullet points that highlight the key points of your discussion.
  • Focus on Key Data: Don’t try to show everything you researched. Focus on the data and results that support your core argument or finding.
  • Whitespace: Use whitespace to allow your content to breathe. Crowded slides are harder to process and less visually appealing.

Visual Hierarchy

Establishing a visual hierarchy ensures that the most important information is easily identifiable. This can be achieved through:

  • Font size and style: Use larger fonts for headlines and smaller ones for supporting details. Avoid overly complex fonts.
  • Color contrasts: Make sure your text stands out against the background. This can be achieved by using contrasting colors or highlighting important information.
  • Bold headings and subheadings: These create natural breaks and draw the audience’s attention to specific parts of the slide.

Consistency in Design

Consistency in slide design helps maintain the audience’s focus and reduces distractions. Ensure that all slides follow a consistent style:

  • Use the same font and size across all slides.
  • Apply a cohesive color scheme throughout the presentation.
  • Stick to a standard layout, with titles at the top and supporting content in the same position on each slide.

By maintaining consistency, your presentation will feel more polished and professional, ensuring that your audience can concentrate on your research.

3. Structuring Your Presentation

A well-organized slide deck helps the audience follow your narrative from start to finish. Structuring your slides around a logical flow is essential to maintaining engagement, particularly for technical presentations.

Introduction and Problem Statement

Your first few slides should provide an overview of your research:

  • Background of the Problem: Briefly explain why this area of research is important.
  • Research Question: Clearly state the problem or question your research addresses.
  • Objective of the Study: Highlight the main goals and contributions of your research.

Make sure this section is concise and sets up the context for the rest of your presentation.

Methodology and Research Process

This section should provide an overview of how you approached the problem. Instead of listing everything you did, focus on:

  • Key Techniques or Algorithms: Explain the most relevant techniques or methods.
  • Process Flow: Use diagrams or flowcharts to represent your research process.

Diagrams and flowcharts are especially effective because they simplify complex processes, making them easier for the audience to follow.

Results and Visual Data

Presenting results effectively is crucial in SIGGRAPH presentations. Often, this section contains a lot of visual data, which can include charts, graphs, and even interactive elements or simulations.

  • Use Graphs Wisely: Make sure that graphs are simple and clear. Label axes properly and avoid excessive use of colors or complex formatting.
  • Before and After Comparisons: If your research shows an improvement in existing techniques, use before-and-after visualizations to make this impact clear.
  • Interactive Visuals: SIGGRAPH encourages cutting-edge research, so consider incorporating interactive elements like video clips or animated slides to demonstrate dynamic concepts.

Conclusion and Future Work

Your final slides should summarize the main points of your research and suggest possible avenues for future study. End with:

  • Summary of Key Findings: Recap your results and why they are significant.
  • Future Research: Provide a brief insight into how your work can be extended or applied in future research.

4. Making Complex Ideas Accessible

SIGGRAPH presentations often involve highly technical content. However, it’s important to ensure that your slides make these concepts accessible to all audience members.

Simplifying Technical Jargon

While your audience may be knowledgeable, it’s essential to avoid assuming they know all of the technical jargon specific to your research. Where necessary:

  • Define Complex Terms: If you must use specialized terminology, define these terms briefly on the slide or through your verbal presentation.
  • Use Analogies: Analogies can be a powerful tool for explaining difficult concepts by relating them to more familiar ones.

Using Diagrams and Visualizations

Visuals are an effective way to simplify and explain complex ideas. Use:

  • Flowcharts: To break down processes into simple steps.
  • 3D Visualizations: Especially in fields like computer graphics, visual demonstrations are essential.
  • Video Clips or Animations: In cases where movement or interaction is important to the research, use video clips to showcase these aspects.

5. Engagement and Storytelling in Research Slides

Engaging the audience is more than just presenting data. Good presentations use storytelling techniques to maintain interest.

  • Start with a Hook: Consider starting your presentation with a provocative question or surprising statistic to grab attention.
  • Narrative Flow: Structure your slides so that they tell a story, with each section building on the last, culminating in your results and conclusions.
  • Relatable Examples: Where possible, include real-world applications or relatable examples of how your research could be used.

This technique not only makes your presentation more interesting but also helps the audience understand and remember your key points.

6. Common Mistakes to Avoid in SIGGRAPH Presentations

While designing your slides, be mindful of some common mistakes that can undermine your presentation’s effectiveness.

  • Overloading Slides with Information: Don’t try to fit too much data on one slide. Break complex information into multiple slides if necessary.
  • Using Distracting Visuals: Stick to visuals that support your message. Avoid overly complex animations or distracting graphics that can take away from your research.
  • Inconsistent Formatting: Make sure your fonts, colors, and layouts are consistent throughout your slides. Inconsistencies can make your presentation look unprofessional.
  • Lack of Practice: No matter how well-designed your slides are, practice your presentation multiple times to ensure smooth delivery.

7. Conclusion: How to Create Lasting Impact with Your Research Slides

Creating effective slides for a SIGGRAPH presentation is about more than just good design—it’s about communicating your research in a clear, engaging, and visually compelling way. By focusing on clarity, structuring your content well, and using visuals strategically, you can ensure your research makes a lasting impact on your audience. Tailor your presentation to the needs of the SIGGRAPH audience, and remember to rehearse your delivery to ensure confidence and fluency.

Continue Reading

Technology

How to Tossh Into Garogoye: A Step-by-Step Analysis

Published

on

Introduction

If you’re familiar with the mysterious world of fantasy transformations or mythological practices, you may have heard about “tosshing” into a “garogoye.” While these terms might sound esoteric, they are steeped in symbolism and lore. Whether you’re delving into a new fantasy realm or curious about its real-world metaphoric implications, understanding how to “tossh into garogoye” can provide intriguing insights.

In this blog, we’ll break down the process of how to tossh into garogoye. We will explore the origins of these terms, what they represent in various contexts, and the step-by-step method to achieve this transformation. Whether it’s a literal transformation in a fantasy setting or a metaphor for personal change, this guide will cover everything you need to know about tosshing into garogoye. Let’s dive into this unique and powerful process.

What Does “Tossh Into Garogoye” Mean?

Before we explore the “how,” it’s essential to clarify what “tosshing” and “garogoye” represent.

  • Tossh: This term can be interpreted as a metaphoric or physical leap into a transformation process. In the fantasy world, “tosshing” often involves embracing change, taking risks, or evolving into a new state of being.
  • Garogoye: The “garogoye” is reminiscent of the mythical gargoyle—a creature commonly depicted as a stone figure perched on buildings, symbolizing guardianship or transformation. In some lore, garogoyes represent protectors who have undergone a transformation from stone to life or from one form to another.

Thus, to “tossh into garogoye” can be interpreted as the act of throwing oneself into a transformative state, possibly adopting a protective or evolved form. This concept is often seen in mythology, fantasy literature, or spiritual journeys, where one undergoes significant personal change, either literally (in a fantasy setting) or metaphorically (in real life).

The Origins of Tossing Into Garogoye

The roots of the concept of tosshing into garogoye can be traced back to ancient mythologies and folklore surrounding gargoyles and transformation. In many mythological traditions, creatures like gargoyles were not just grotesque statues but guardians that could come to life under specific conditions—often to protect something of great value.

The process of transformation, in these legends, wasn’t simple. It required certain triggers or catalysts, often linked to elemental forces, deep knowledge, or powerful rituals. Similarly, the modern concept of “tosshing into garogoye” may draw inspiration from these mythological transformations, symbolizing a profound change from one state of being to another.

The term “tossh” itself can be seen as a form of initiation, marking the point where an individual or entity must actively choose to embrace the change, leaping into the unknown. Whether it involves physical strength, mental resilience, or spiritual fortitude, tosshing into a garogoye often requires dedication, knowledge, and a willingness to face challenges head-on.

In various stories and games, this concept appears as a rite of passage. The protagonist, often faced with insurmountable odds, must undergo a process to unlock hidden potential, much like tosshing into a garogoye. This journey is symbolic of the internal and external struggles that lead to transformation.

Step-by-Step Guide to Tossh Into Garogoye

Now that we understand the meaning and origin, let’s look at the process of how to tossh into garogoye. Whether you’re using this in a fantasy scenario or as a metaphor for personal growth, the steps remain largely symbolic but powerful.

1. Preparation and Understanding the Task

Before embarking on the process of tosshing into garogoye, preparation is key. Here are some crucial elements to consider:

  • Knowledge Acquisition: In many tales and games, the process of transformation requires gaining knowledge. You must fully understand the nature of the garogoye you wish to become. This includes its strengths, weaknesses, and how it fits into the larger context.
  • Mental Readiness: Tosshing into garogoye isn’t just a physical transformation; it requires a mental shift. You must prepare yourself mentally for the challenges that lie ahead. In real-life metaphors, this could symbolize preparing for a big change, like starting a new career or overcoming a major personal obstacle.
  • Gathering Resources: Just like in role-playing games where you gather artifacts or powers to unlock certain abilities, preparing to tossh into garogoye might involve collecting items, allies, or information. This step is essential for success in both the literal and metaphorical transformation.

2. Invoking the Catalyst

Every transformation requires a catalyst—something that triggers the change from your current state into the garogoye form. In many legends, this can be a ritual, a spell, or a specific event. In a practical, real-world sense, this represents the moment of decision, the point where you commit to the transformation.

  • Elemental or Magical Forces: In fantasy settings, elemental forces like lightning, fire, or water are often depicted as catalysts for change. This may be represented in the form of a dramatic event or confrontation that forces the transformation. In real life, the catalyst could be a life-changing decision.
  • Ritual or Ceremony: Depending on the lore, there may be a specific ritual involved in tosshing into garogoye. This could involve the recitation of incantations, the use of ancient symbols, or invoking specific deities. This step emphasizes the seriousness of the transformation.

3. The Tossh: Embracing the Leap

Once you’re ready, the next step is the actual “tossh”—the leap into the transformation process. In many ways, this step symbolizes an all-in commitment, the point of no return.

  • Taking the Leap: The tossh is a symbolic or physical leap of faith. Whether it’s jumping into a new role, making a life-changing decision, or simply embracing change, this step represents the willingness to evolve.
  • Overcoming Fear: A crucial part of tosshing into garogoye is overcoming the fear of the unknown. Transformation is inherently risky, and fear can hold you back. However, the tossh itself represents the rejection of that fear.

4. The Transformation

This is the most critical step in tosshing into garogoye—where the actual change takes place. Whether it’s a physical transformation (like turning into a garogoye) or a more metaphorical one (like becoming a stronger, more resilient person), this step marks the climax of the process.

  • Physical or Symbolic Change: In the fantasy sense, this could involve turning into the powerful garogoye form. In real life, this may mean overcoming a significant obstacle or achieving a personal goal.
  • Embodying New Powers or Abilities: Once the transformation is complete, you gain new abilities or insights. In the garogoye’s case, it could be enhanced strength, flight, or resilience. In real life, it may symbolize newfound confidence, wisdom, or emotional strength.

5. The Aftermath: Adjusting to Your New Form

After the transformation, there’s always a period of adjustment. The new garogoye form might come with unforeseen challenges, just as any significant life change requires time to get used to.

  • Mastering New Abilities: In the fantasy world, once you’ve become a garogoye, you’ll need to master your new powers. Similarly, in life, you’ll need time to adjust to the changes brought by tosshing.
  • Facing New Challenges: Transformation is never the end of the story. Once you’ve become a garogoye, you may face new challenges that only your new form can handle. This keeps the process dynamic and ongoing, reflecting life’s continuous nature.

Common Challenges and How to Overcome Them

Tosshing into garogoye is not without its challenges. Below are some common obstacles and tips for overcoming them:

  • Fear of the Unknown: Transformation is inherently frightening. To overcome this, trust in the process and prepare as much as possible beforehand.
  • Resistance to Change: Often, the biggest challenge is internal resistance. By embracing the necessity of change and understanding its benefits, you can push through this barrier.
  • Lack of Resources: In some cases, the process may stall due to a lack of resources, whether it be knowledge, power, or allies. Overcoming this requires creativity, adaptability, and persistence in gathering what you need.

Conclusion

Tosshing into garogoye is a metaphorically rich and powerful concept, whether viewed through the lens of fantasy or real-life transformation. The process represents the journey of change, from preparation and decision to transformation and mastery. Understanding how to tossh into garogoye not only provides insight into ancient lore but also offers a useful framework for approaching personal or professional changes in life.

By following the steps outlined in this guide, you can embrace the challenges of transformation and come out stronger on the other side—whether you’re tossing into a garogoye or making significant life changes. Whatever form your transformation takes, remember that the process is just as important as the outcome.

Continue Reading

Trending